Posts in Tutorials
Patchwork Camera Strap Tutorial

Hey there! Long time, no see. I am happy to be back in this space (always!) with a tutorial to share with you all.

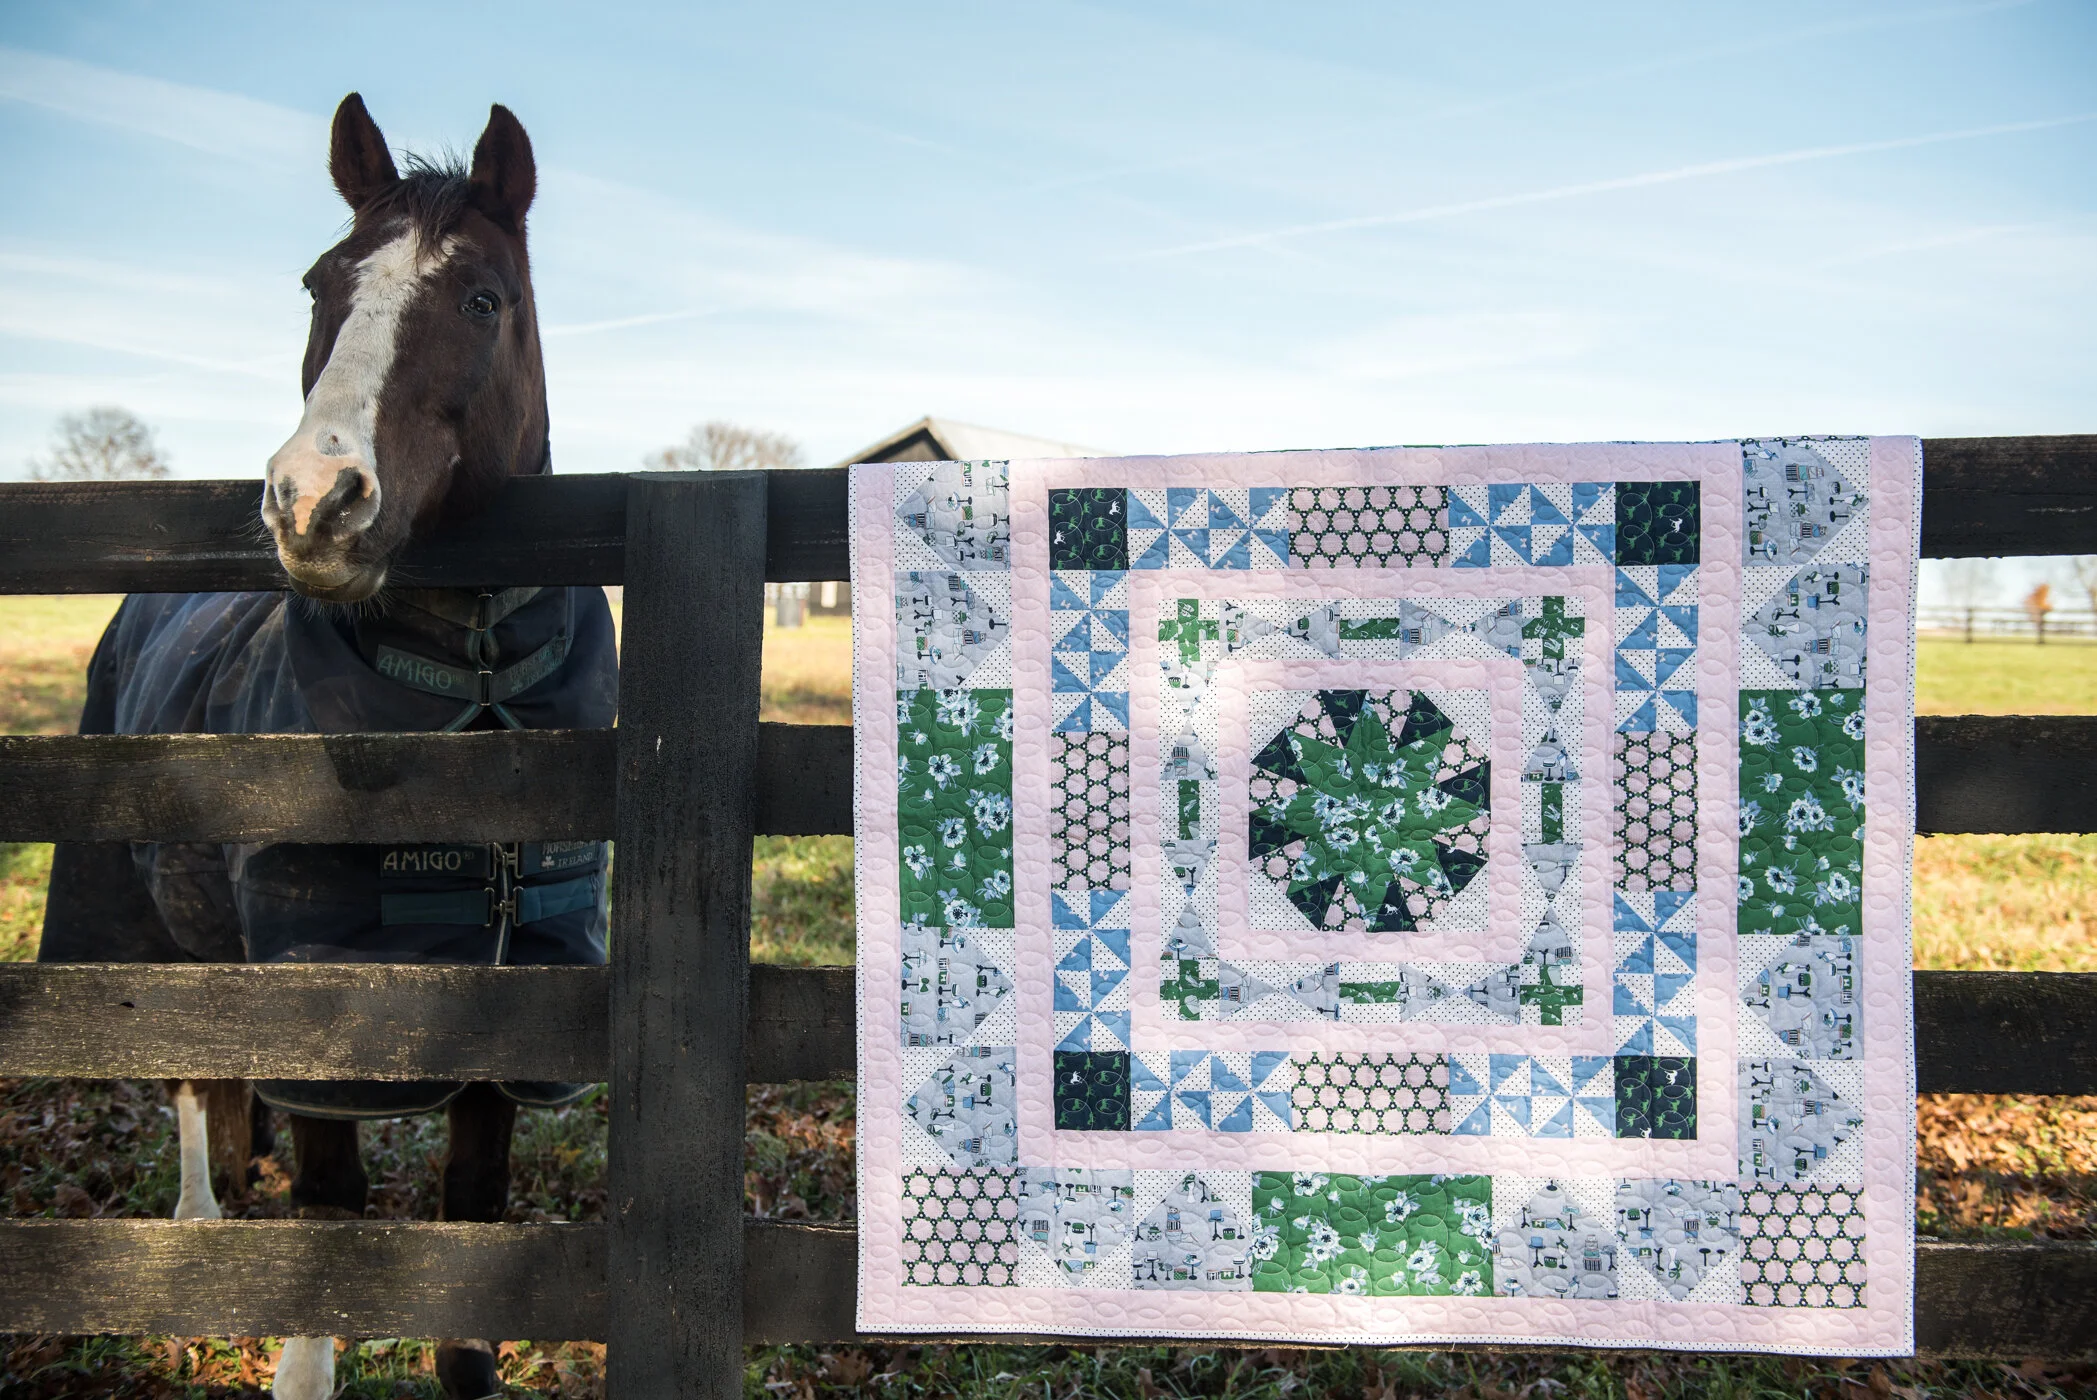
Some of you may remember that I used to make patchwork camera straps and sell them periodically. I recently had the opportunity to make one for Bonnie Christine's newest fabric line, The Open Road, for Art Gallery Fabrics. Because I am not interested in making these to sell any longer, I decided to write up a tutorial for any of you who are interested in making your own.

For one patchwork camera strap you will need:

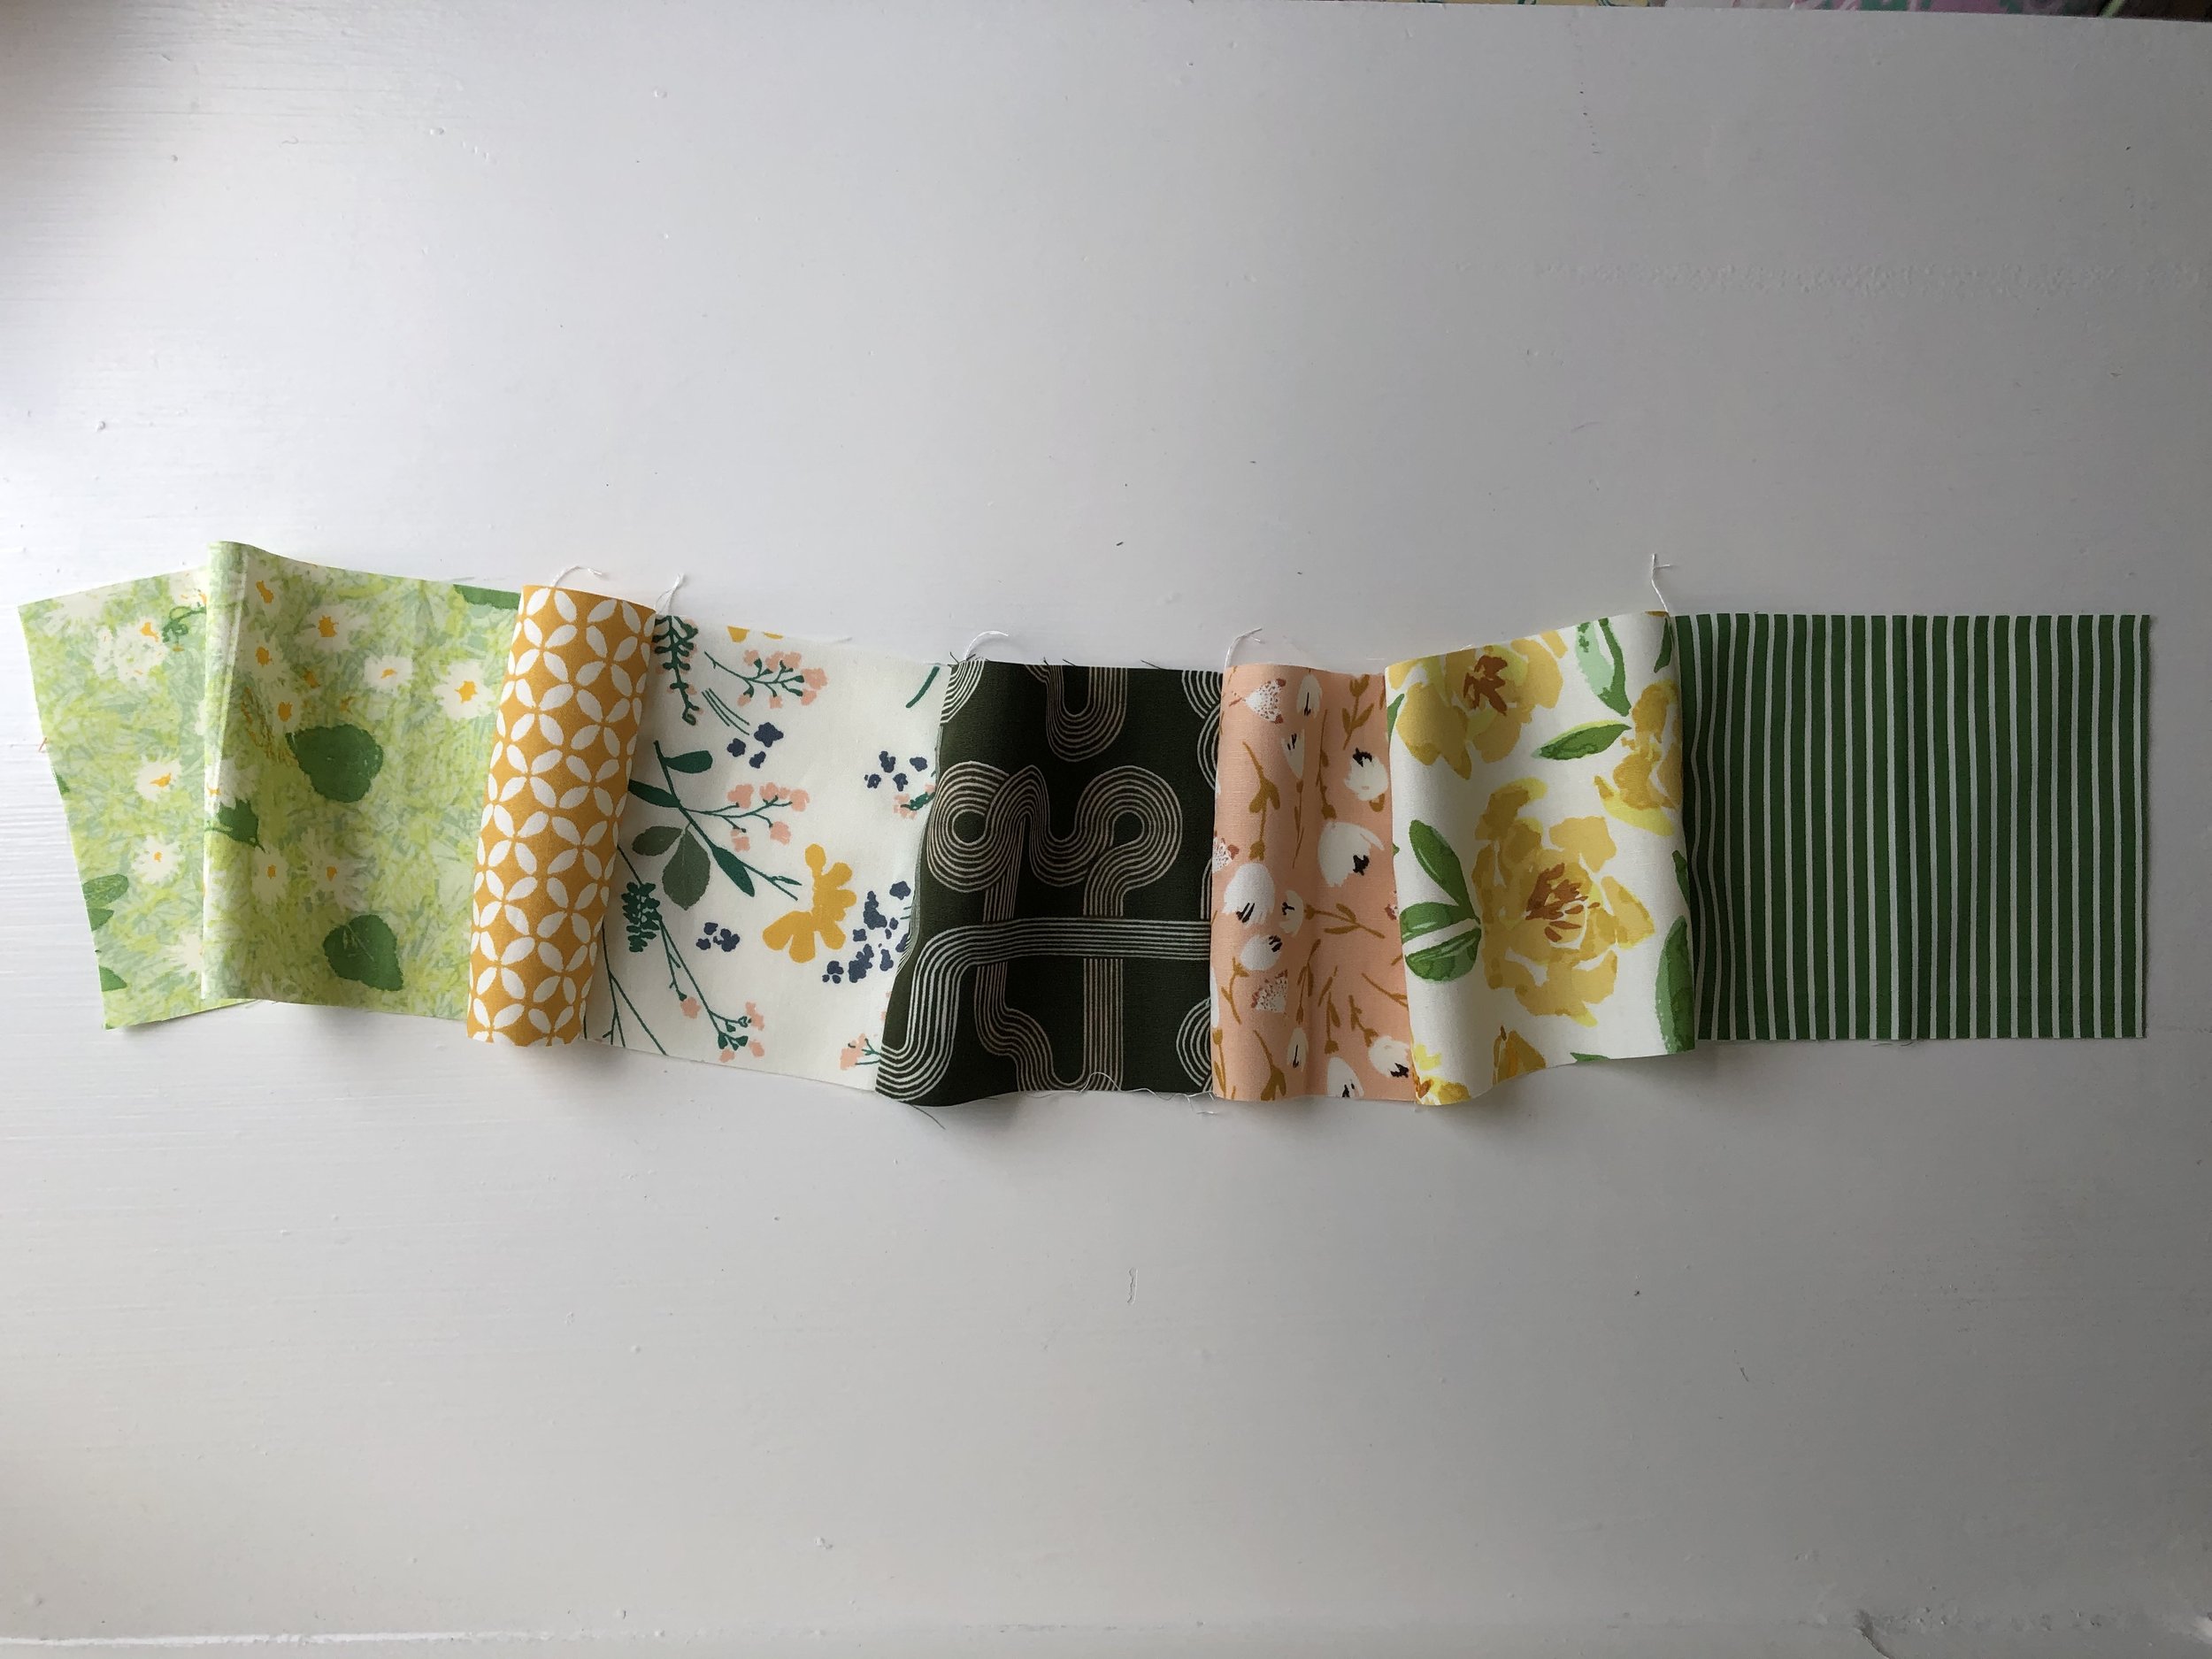
fabric scraps, at least 4" wide in one direction. (Tip: go for a variety of patterns in different scales for the most successful combination.

fusible, mid-weight interfacing cut to 3" x 24" (I like Pellon Decor Bond)

polyester thread - I use white on the patchwork and black on the strap ends.

spray adhesive (I like 505 brand)

sewing machine with a walking foot

You will also need:

scrap of marine vinyl or leather for strap ends, at least 4" x 4" - cut 4 strap ends using the template. Download the template HERE

3/8" nylon webbing (two lengths of 16" each) and two each 3/8" triglides (the adjustable hardware on the strap) and 3/8" keepers.

Gather your fabrics and take some time to arrange them in the order you like. You will want to have a finished length of patchwork that is 4" x 25". I often cut the fabrics on each end of the strap longer than I think I will need and then trim to 25" after it is sewn.

2. Sew the fabrics rights sides together, using a 1/4" seam allowance. Press the seams open.

3. Center the fusible interfacing on the wrong side of the patchwork strip and fuse it in place. There should be 1/2" of fabric showing on all four edges.

4. Press the excess fabric towards the interfacing along both long edges. The short edges should remain unpressed.

5. Fold the strap in half, matching long edges and press it along the folded edge.

6. Stitch the opening closed 1/8" from the open edge. Then sew another line of stitching 1/8" from the folded edge. You do not need to sew the short edges.

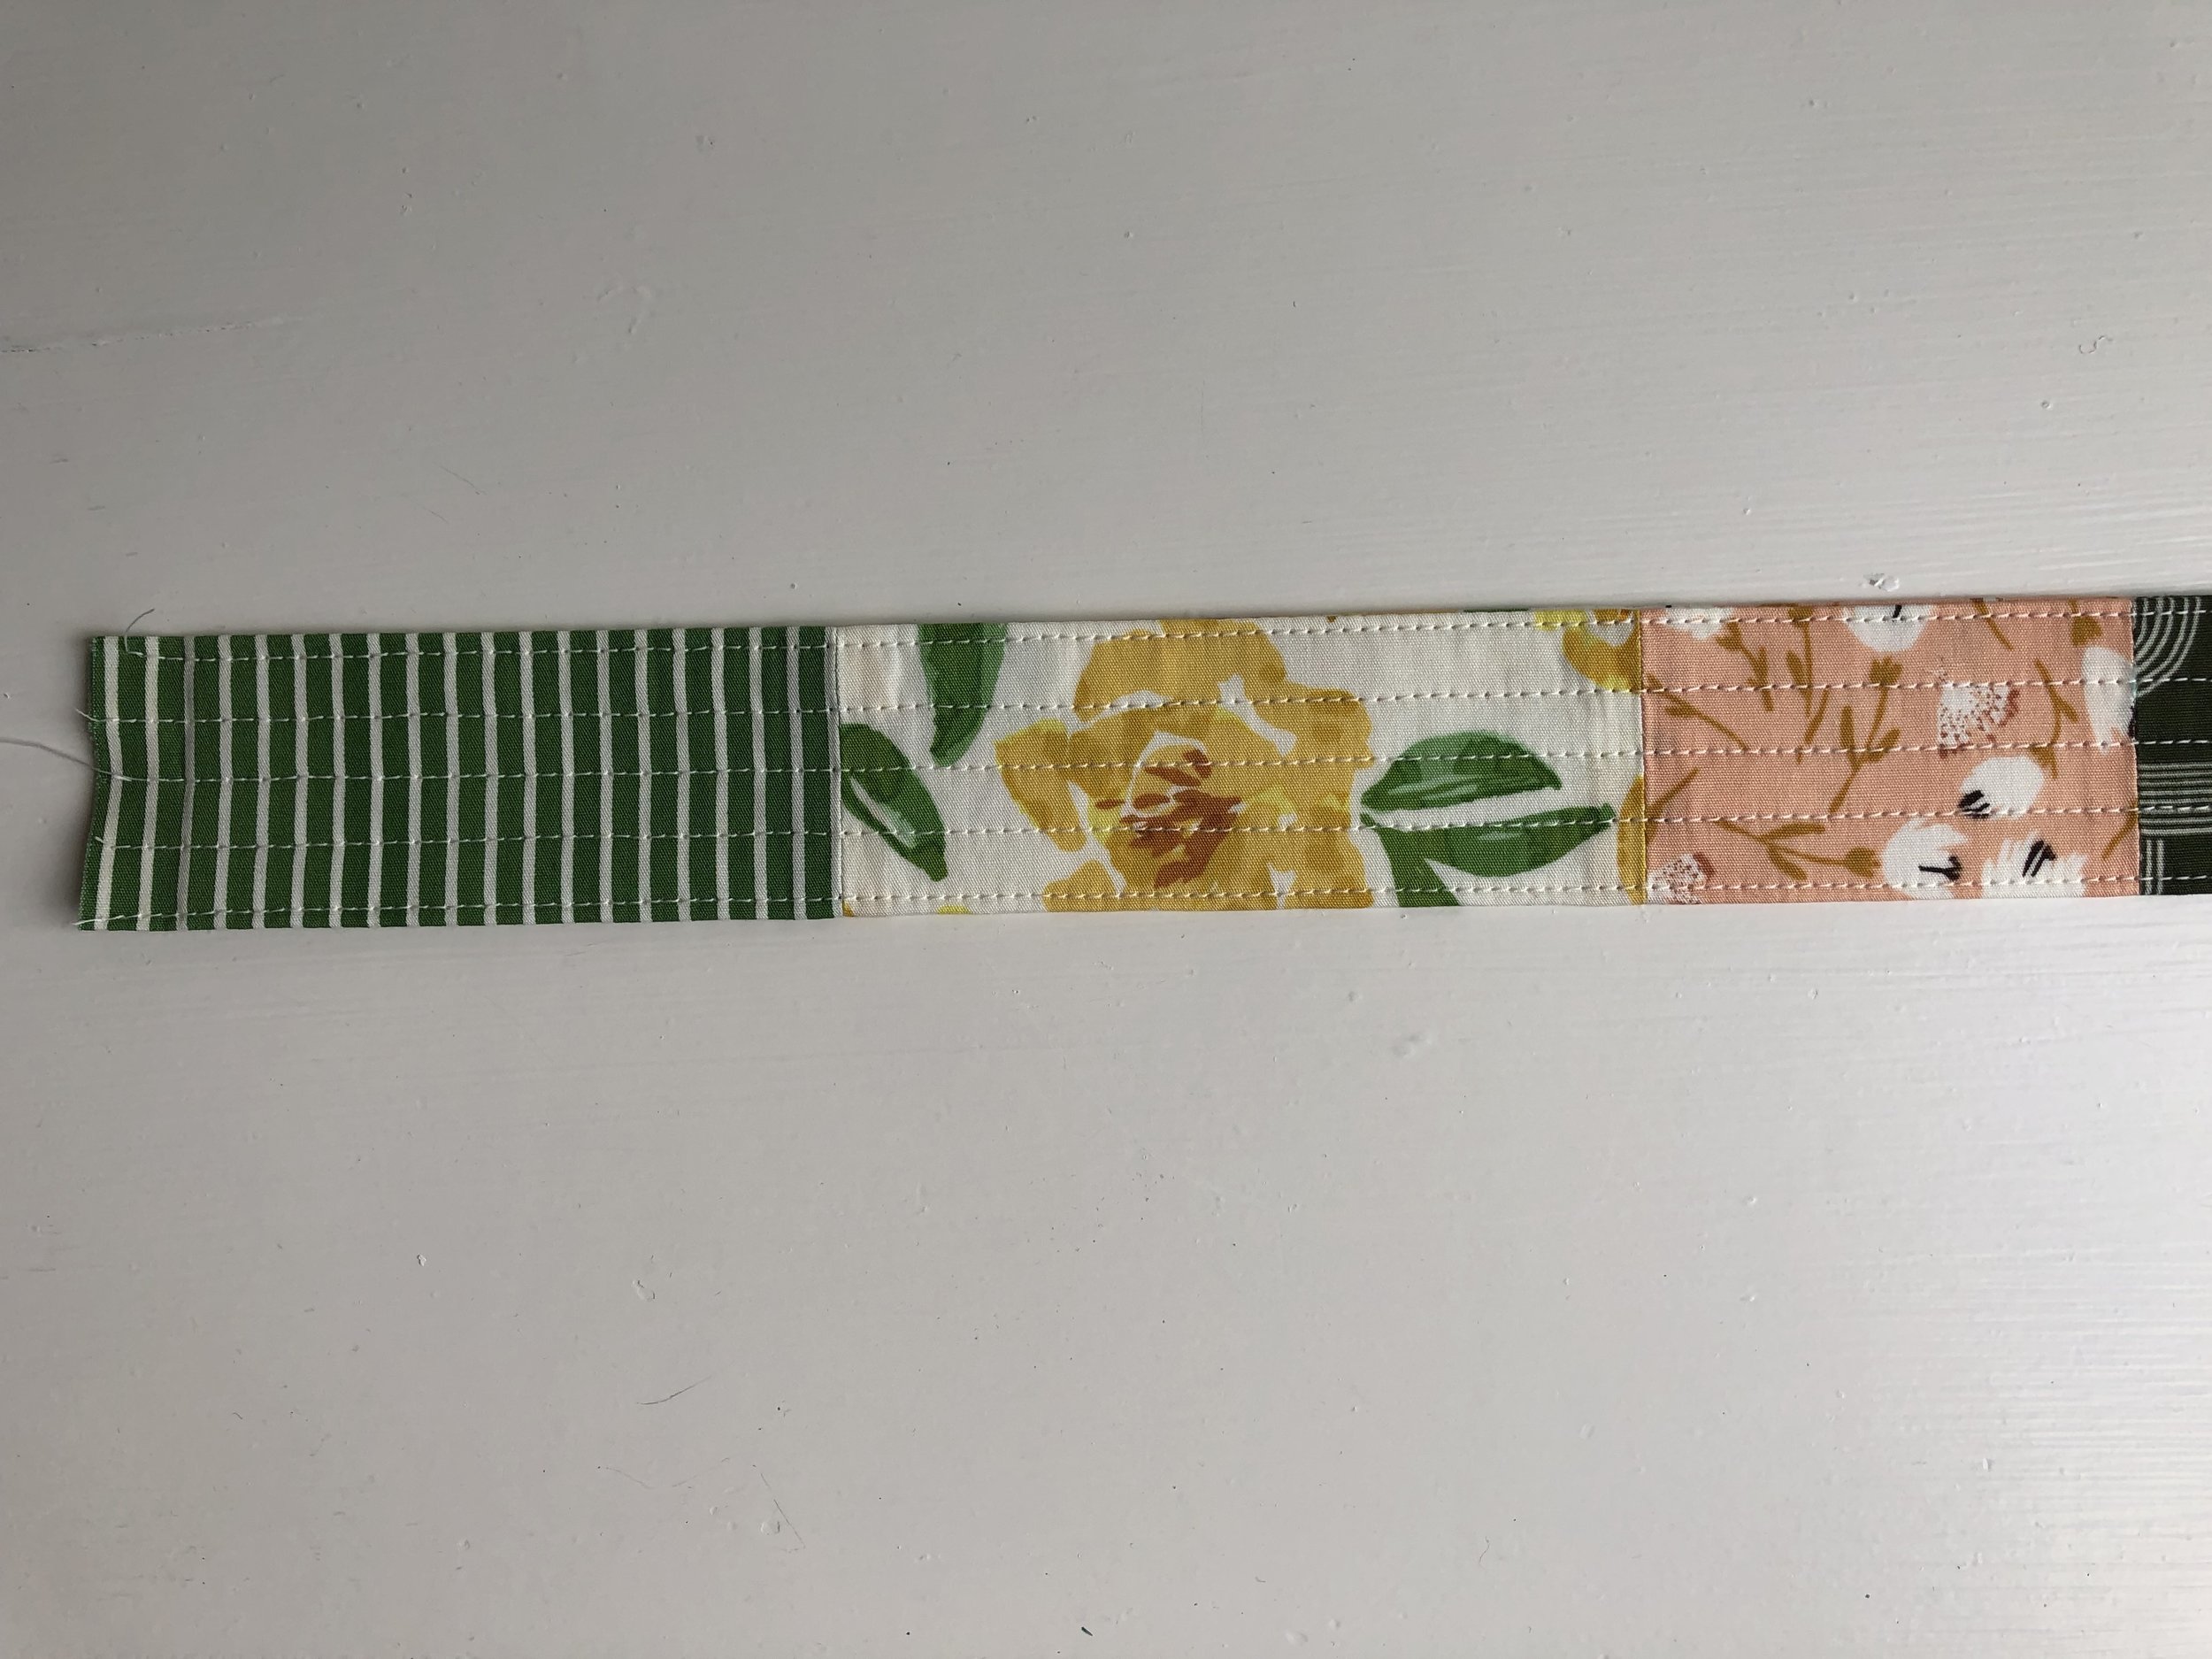
7. At this point, you can add additional stitching if desired. It is my opinion that this increases the strength of the camera strap. I sew down the center of the strap and then between the center line of stitching and each edge.

8. Cut four strap ends using the template provided above. Spray the wrong side of the strap ends with your spray adhesive. I like to do this by placing the strap ends in a cardboard box and taking the whole set up outside to do the actual spraying.

9. Place one strap end right side down on a work surface. Place the camera strap on the strap end so it extends almost the full length of the wide part of the strap end.

10. Place one 16" length of the nylon webbing over the short edge of the strap end so it extends 1/2" on to the patchwork strap.

11. Place a second strap end on top, matching up edges with the bottom strap end and enclosing the nylon webbing and patchwork strip. The spray adhesive keeps everything in place so you will not have shifting when you move the strap to the sewing machine.

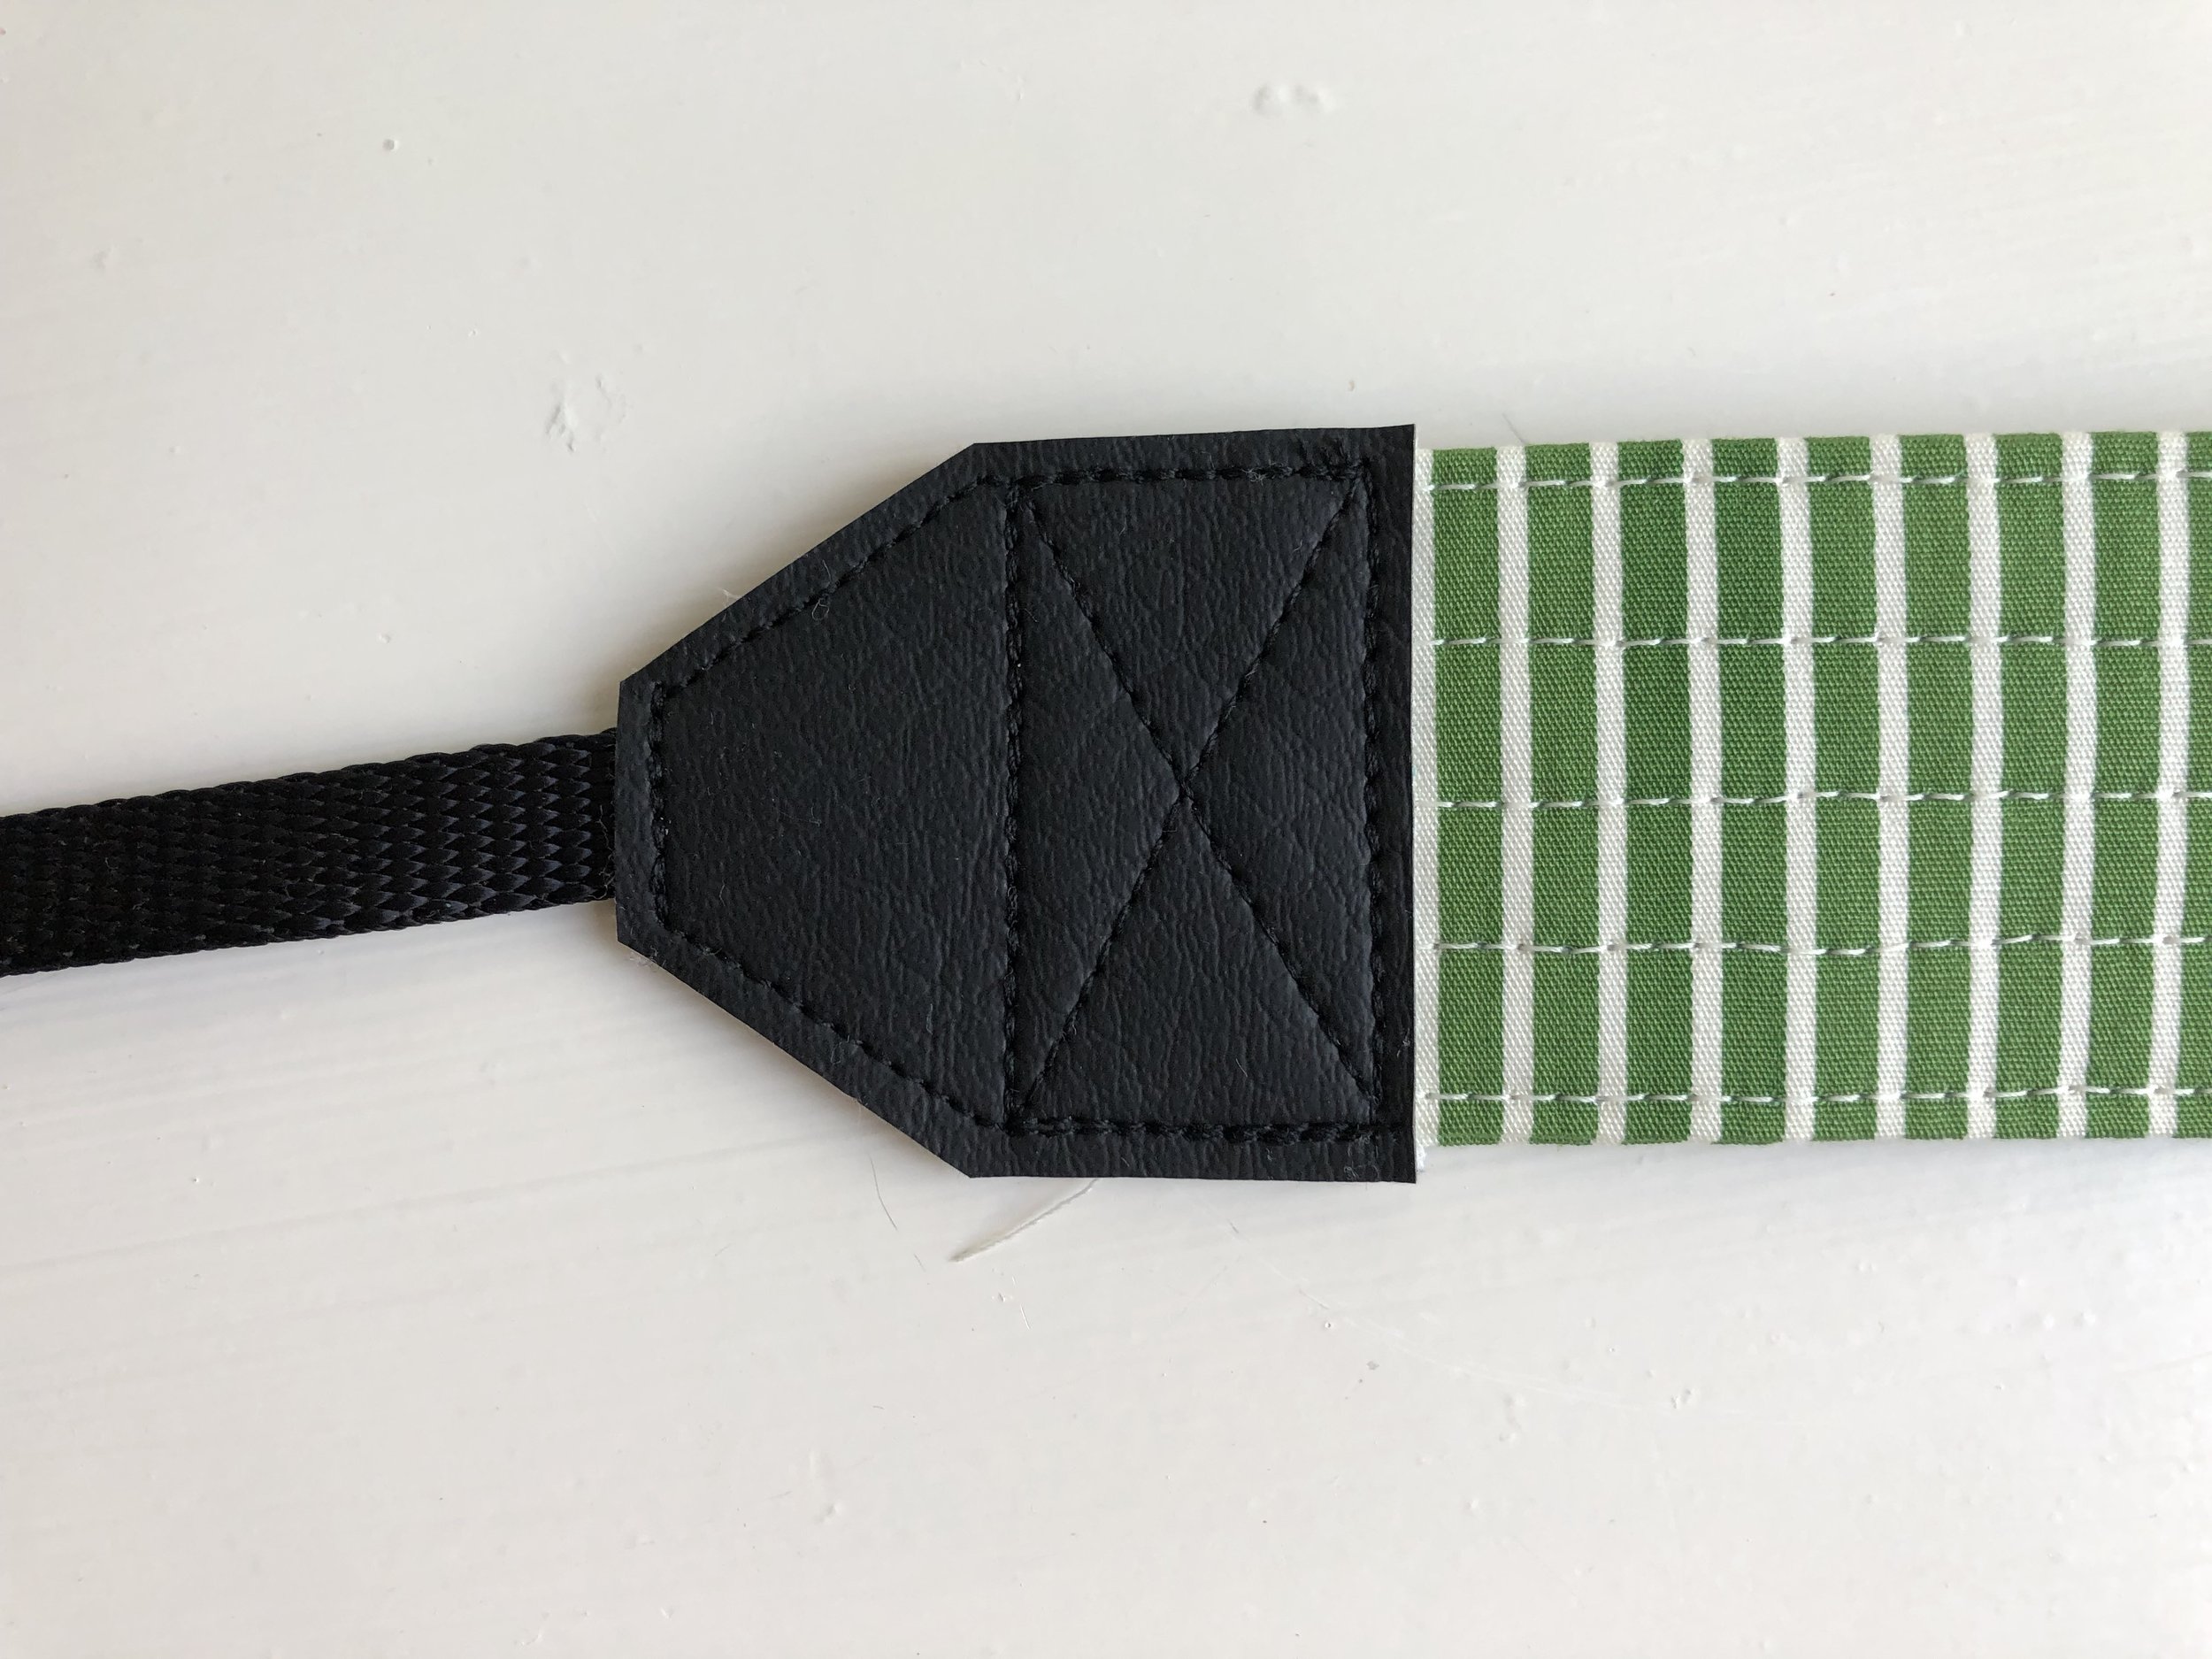
12. Using the walking foot and referencing the photo and diagram above, first sew around perimeter of the strap end (shown in red). Backstitch over the nylon webbing to give it extra security. Next, sew a rectangle with an X (shown in yellow) to reinforce the strap end.

Repeat steps 9 through 12 with other end of the patchwork strap and the remaining two strap ends.

13. Thread a keeper and then a triglide on to the strap.

That's it! If you have questions, please ask them in the comments and I will answer them there for everyone's benefit. If you make a patchwork camera strap using this tutorial, I'd love to see one. You can tag me @houseonhillroad on Instagram .

I hope your summer is going well. See you soon!

Tutorials Comment
Derby Day Medallion Quilt

I'm excited to be today's stop on Melissa Mortenson's Derby Day fabrics blog tour. Not only is Melissa an amazing fabric designer for Riley Blake, but she is an avid and productive blogger over at the Polka Dot Chair. You definitely need to check out her blog as it is chock-full of great tutorials and cute ideas. And, just so you know, she took these amazing photos of my quilt with the horses! I mean, really. How cool! (The other quilts shown can be found on her blog.)

But, back to the fabrics.... Melissa and I share a hometown and, as such, it is no surprise that these fabrics hold a soft spot in my heart. They are all about the feeling, excitement and pageantry that is the Kentucky Derby and they are in the happiest shades of blue, pink and green! I am particularly smitten with the large scale florals and those hexagons that remind me of vintage bathroom tile. I can see so many uses for all these great prints.

When Melissa asked me if I would make a quilt using her Derby Day fabrics, I immediately said yes. This was the perfect opportunity to demonstrate how to design a medallion quilt using one of the center medallions and a variety of blocks that are included in Make Your Own Medallion. When I decided to write this book, it was important to me that the book was more than a collection of quilt patterns. I wanted it to be a resource that you could use to create a medallion design of your very own. It's the book that I was looking for when I set out to make my first medallion quilt and didn't know where to start. Make Your Own Medallion gives you all the tools you need to mix and match blocks to come up with a unique quilt of your own. That's exactly what I did to make the Derby Day Medallion Quilt and today I am sharing the pattern so you can make one, too!

To make the Derby Day Medallion Quilt, you will need:

Make Your Own Medallion

Fabric A: 1 1/2 yards White with Navy Pindot (for background and binding)
Fabric B: 1/2 yard Floral Garland Pink (hexagon)
Fabric C: 1/4 yard or Fat Quarter Horses Navy
Fabric D: 1/2 yard Derby Main Green (floral)
Fabric E: 3/4 yard Haberdashery Blue
Fabric F: 1/4 yard or Fat Quarter Accessories Green
Fabric G: 3/8 yard Ribbon Blue (periwinkle color)
Fabric H: 1 1/8 yard Cross My Heart Pink- from Shine Bright Fabric Line

Finished Size: 52 1/2'' x 52 1/2''

Instructions:

Center Medallion: Cut and sew the Spinning Star medallion on page 82 of Make Your Own Medallion using Fabrics A, B, C and D.

Border 1:

1. Cut (2) strips 2'' x WOF from Fabric H. Sub-cut these into (2) strips 2'' x 12 1/2'' and (2) strips 2'' x 15 1/2''.

2. Sew (1) 2'' x 12 1/2'' strip to each the left and right sides of the center medallion. Press the seams towards Border 1. Sew (1) 2'' x 15 1/2'' strip to each the top and bottom edge of the quilt top. Press the seams towards Border 1.

Border 2:

3. Cut and sew (16) 3'' finished Equal-Triangles from Fabrics A and E following the instructions on page 34.

4. Cut and sew (4) 3'' finished Rails from Fabrics A and F following the instructions on page 30.

5. Cut and sew (4) 3'' finished Plus blocks from Fabrics A and F following the instructions on page 31.

6. Construct the left and right borders as indicated and sew to the side edges of the quilt top. Press the seams towards Border 1.

7. Construct the top and bottom borders as indicated and sew to the top and bottom edges of the quilt top. Press the seams towards Border 1.

Border 3:

8. Cut (4) strips 2'' x WOF from Fabric H. Sub-cut these into (2) strips 2'' x 21 1/2'' and (2) strips 2'' x 24 1/2''.

9. Sew (1) 2'' x 21 1/2'' strip to each the left and right sides of the quilt top. Press the seams towards Border 3. Sew (1) 2'' x 24 1/2'' strip to each the top and bottom edge of the quilt top. Press seams towards Border 3.

Border 4:

10. Cut and sew (16) 4'' finished Pinwheel blocks from Fabrics A and G following the instructions on page 57.

11. Cut (4) 4 1/2'' x 8 1/2'' rectangles from Fabric B.

12. Cut (4) 4 1/2'' x 4 1/2'' squares from Fabric C.

13. Construct the left and right borders as indicated and sew to the side edges of the quilt top. Press the seams towards Border 3.

14. Construct the top and bottom borders as indicated and sew to the top and bottom edges of the quilt top. Press the seams towards Border 3.

Border 5:

15. Cut (4) strips 2 1/2'' x WOF from Fabric H. Sub-cut these into (2) strips 2 1/2'' x 32 1/2'' and (2) strips 2 1/2'' x 36 1/2''.

16. Sew (1) 2 1/2'' x 32 1/2'' strip to each the left and right sides of the quilt top. Press the seams towards Border 5. Sew (1) 2 1/2'' x 36 1/2'' strip to each the top and bottom edge of the quilt top. Press seams towards Border 5.

Border 6:

17. Cut and sew (16) 6'' finished House blocks from Fabrics A and E following the instructions on page 55.

18. Cut (4) 6 1/2'' x 12 1/2'' rectangles from Fabric D.

19. Cut (4) 6 1/2'' x 6 1/2'' squares from Fabric B.

20. Construct the left and right borders as indicated and sew to the side edges of the quilt top. Press the seams towards Border 5.

21. Construct the top and bottom borders as indicated and sew to the top and bottom edges of the quilt top. Press the seams towards Border 5.

Border 7:

22. Cut (5) strips 2 1/2'' x WOF from Fabric H. Sub-cut (4) strips to measure 2 1/2'' x 42 1/2''. Sub-cut remaining (1) strip into (2) strips 2 1/2'' x 6 1/2'' and (2) strips 2 1/2'' x 10 1/2''.

23. To make the side borders (2 1/2'' x 48 1/2''): Sew (1) 2 1/2'' x 42 1/2'' strip to each of the (2) 2 1/2'' x 6 1/2'' strips. Press the seam towards one side. Sew (1) border to each the left and right edges of the quilt top. Press seams towards Border 7.

24. To make the top and bottom borders (2 1/2'' x 52 1/2''): Sew (1) 2 1/2'' x 42 1/2'' strip to each of the (2) 2 1/2'' x 10 1/2'' strips. Press the seam towards the side. Sew (1) border to each the top and bottom edge of the quilt top. Press seams towards Border 7.

Finishing:

25. Sandwich, baste and quilt as desired. (I used free-motion loops.)

26. Cut (6) strips 2 1/2'' x WOF from Fabric A for double-fold binding. Bind quilt in your preferred method.

If you make the Derby Day Medallion quilt, I'd love to see your version! Tag me (@houseonhillroad) and Melissa (@polkadotchair) on Instagram and use the hashtags #makeyourownmedallion#derbydayfabrics. This post contains affiliate links.

Free Christmas Quilt Tutorial

Super sized ohio star christmas quilt by house on hill road

I've been wanting to make a Christmas quilt for awhile and last week, I decided that it was about time. In a matter of a couple of days, I had cut all the pieces for this Super-Sized Ohio Star quilt and pieced the entire top! Then, I decided to make a second one. It truly is fast and easy! And to prove it, I wrote up a tutorial for the block to share with you all.

Get the FREE tutorial for this Super Sized Ohio Star Christmas Quilt right here.

A couple of notes:

- The tutorial is entirely hand written and hand illustrated so, needless to say, the drawings aren't to scale. I am pretty sure that I spelled everything correctly, but I just went for it using a black sharpie so please excuse any grammar/spelling mistakes.

- This super-sized block finishes at 18". I used 16 of them for a 72" x 72" square quilt. You could definitely go smaller. In fact, I love making nine 21" finished blocks for a 63" x 63" quilt and I give you the cutting instructions for those as well.

- In the tutorial, I say that you need 16 fat quarters or 16 quarter yards of the prints. You can get away with fat eighths if you have those, but an 1/8 of a yard will not cut it.

- I didn't specify a seam allowance so use your standard 1/4" for quilts.

- If you decide to print out the PDF, you may want to reduce it to 95% or the like. I used the entire sheet of paper because I was writing and drawing. If you print it at 100%, some information might get cut off.

- Let me know if you make one! You can tag me on instagram ( @houseonhillroad ) or use the hashtag #houseonhillroad.

- Questions? Ask them in the comment section of this post and I will do my best to answer them here so others can benefit from the information.


Now go sew. Seriously. Go. Sew.

I

Wild Violet Quilt (and tutorial)

Wild violet quilt by house on hill road

On a complete and total whim a few weeks ago, I decided to make an improv quilt. The fabrics, mostly Shelburne Falls by Denyse Schmidt, just spoke to me as I was wading through the stash. I don't know what drew me to the purple - perhaps the wild violets that show themselves in the grass every spring? No matter! Purple it was! And bonus because I have a dear friend whose birthday was around the corner and she loves purple like I love green. No better time than that! I grabbed the fabrics, pulled in a couple of other prints (a purple gingham, the pink pez, red and pink dot) and some Kona snow (always on hand!) and started cutting.

Wild violet quilt blocks

If you'd like to make something similar yourself, the process is super simple. I cut full widths of the printed and the white fabrics about 14" long. Then I sub-cut them into smaller strips using my rotary cutter without the ruler. I was intentional in making them different widths and a little wonky/angled, but not too crazy. I paired each printed strip with a white strip and sewed them together.

Wild violet quilt blocks 2 by house on hill road

Once that step was complete, I took each print/white pair and sewed it to another print/white pair so that I ended up with "blocks" alternating 2 prints with 2 white strips. I find that making blocks like this to arrange in the quilt top is measurably faster and easier for me. It takes much less time to lay everything out, I have fewer design decisions to make and I make them faster! Once I had the blocks arranged the in five rows (one for each of my friend's children), I sewed the blocks together. Due to the irregularity of the strips, the sewn rows had to be trimmed down before I was able to sew them together into a quilt top. You do lose a bit of height on all of them - two rows ended up being 12" unfinished and the other three were 12.5" unfinished. I was aiming for a 60" quilt so it is good to cut the strips taller than you think they need to be.

Wild violet quilt 2 by house on hill road

After I had the rows sewn together and the quilt basted, I let it sit for a couple of days before quilting it. I wasn't sure if I wanted straight-ish lines or if I wanted to free motion something. In the end, I decided to quilt it with free motion loops from side to side. I didn't mark the rows, but rather used the seam lines as a general guide and that seemed to work well. The quilting was fast! Maybe an hour and a half? A good reminder that free motion quilting often takes less time than straight lines - I always forget that!

Wild violet quilt 3 by house on hill road

The back was pieced with a 60" wide piece of the purple gingham and a strip of other prints along one side. I bound it with a stripe from the same collection that I didn't use in the quilt top. Oh - and one little part of the binding is another print that was a mistake I added as a design element. I think it gives it a little extra charm.

I washed the quilt so it would be soft and crinkly. I loved how it came out and had so much fun making it. I'm already plotting the next one!

Scrappy Log Cabin Potholder - a tutorial

I just listed bags of my smallest scraps in the shop. Just like the large scraps, I am offering these in warm colors, cool colors and mixed colors. Each bag of scraps has at least 40 small pieces which are perfect for one of my favorite gifts: scrappy log cabin potholders.

Scrappy log cabin potholder copy

To make these fun potholders you will need:

- A variety small scraps in different lengths, anything over 1" wide will work. For this tutorial, I used a bag of mixed color small scraps from my shop.

- Fabric to frame the log cabin. The amount you need will depend on how big your finished log cabin is. An 1/8" of a yard should be sufficient, but I find that using scraps work well here, too. In fact, I used a very small part of a large bag of white scraps from my shop.

- Two pieces of batting, each 9" square. I use one layer of insulated batting (such as Insul-brite) and one layer of cotton batting, but you can use two layers of cotton or poly/cotton batting as well.

- Sewing machine, walking foot, thread, pins, scissors, knitting needle or chopstick, rotary cutter and ruler

Small scraps 1

Start by separating your scraps roughly by size. You want to start building your log cabin with the smallest scraps first.

Small scraps 2

Begin building the log cabin by sewing the scraps around the center piece one at a time, using a 1/4" seam. Trim off excess fabric as necessary. If you like a slightly wonky look, don't square up your edges. Also, you can always cut larger scraps into smaller pieces if you want to.

Small scraps 3

Once you have completed one ring around the center, add a second ring in the same manner.

Small scraps 4

For an even scrappier look, I start adding my second ring of pieces in a different spot. The first ring started with the yellow print and went counter clockwise. The second ring was started on the opposite side (the orange and pink print). I think this gives the log cabin a little more movement, but you can piece it however you like.

Small scraps 5

Once the second ring is finished, add the frame fabric on two opposite sides. The amount of fabric you need will depend on the size of your log cabin. The square should measure 9" with the frame fabric. Take a quick measurement of your block (mine was about 5") and see what you need (I needed at least 2 1/2" on each side). When calculating, don't forget about seam allowances! It is better to err on the larger size and trim the block later.

Small scraps 6

Next add framing fabric to the two remaining sides and trim the block to 9" square. Note that my log cabin is off center - again, I like that look, but do whatever you desire.

Small scraps 7

Make the hanging loop: Take a small rectangle of fabric (at least 1.5" wide and 3.5" long) and press it in half, making a crease down the length as shown.

Small scraps 8

Press the raw edges in so they meet the crease. Fold the strip in half along the crease, enclosing the raw edges and pin closed. Stitch along the edges of both long sides.

Small scraps 10

Fold the hanging loop in half so that the short ends meet. Place the loop about 1.5" inches in from the side of the front of the potholder. Line up the raw edges with the raw edge of the top front of the potholder and pin in place.

Small scraps 16

Assemble the pot holder by stacking your pieces on top of each other in the following order: two layers of backing, potholder front right side up, potholder back right side down. Pin around all four sides. Using a walking foot, sew the layers together with a 1/2" seam starting on the bottom edge and finishing 4" from where you started to leave a hole for turning.

Small scraps 11

Clip the corners and trim the seams to 1/4" except at the opening as shown. Turn the potholder right side out, using a knitting needle or chopstick to help poke out the corners. Press the entire potholder turning the seam allowances at the opening to the inside. Pin the opening shut.

Small scraps 12

Using a walking foot, stitch around the entire potholder 1/8" from the edge, closing the opening as you sew.

Small scraps 15

At this point, you can add some quilting to the potholder if you desire. On this one, I free motion quilted a little flower type motif on the log cabin. On others I have made in the past, I have quilted the entire potholder in a grid, made loopy designs from end to end, sewed concentric squares across the entire potholder or just over the log cabin. The options are endless! Of course, you could leave it as is without quilting and it would look just as adorable.

Another idea for a small scrap potholder is to do a improvisationally pieced one like this.  Piece scraps together until you have a 9" square and assemble as above. You can substitute a ribbon for the loop if you like.

Small scrap bags are in the shop - shipping is free!

Make flying geese fast: a tutorial

Flying geese

I spent a great chunk of last weekend happily piecing my lastest fabric acquisition into a pile of 96 flying geese blocks. They have since been sewn into a quilt top that, with any luck and some free hours, will get basted and quilted this weekend. My favorite part of making a quilt is undoubtedly piecing. I get in a rhythm when sewing 1/4" seams in rapid succession. I love it when I can get in that groove and sew a bunch of pieces together in a short time. For these flying geese, I used a great method for making multiple blocks that was fast and fun so I thought I'd share how I did it with you.

Flying geese tutorial

Flying geese blocks are rectangular with the finished height being 1/2 the measurement of the finished width, or said differently, their measurments have a ratio of 1 to 2. The blocks I made for the purpose of this demonstration finish at 3.5" x 7" (with the seam allowances they measure 4" x 7.5"), but you can easily adjust this formula to make the blocks any size you desire. It's easy. Another bonus to this method, is that there is no fabric waste when you piece flying geese this way.

Flying geese 1

This method produces 4 identical blocks. You'll need:

- 1 square of fabric cut 1 1/4" larger than the desired finished width. (For my block that is 7" long when finished, I cut my square to 8 1/4").

- 4 squares of fabric cut 7/8" larger than the desired finished height (For my block that is 3 1/2" high when finished, I cut my square to 4 3/8").

- a marking pen or pencil, straight pins, sewing machine and thread, a rotary cutter and ruler

Flying geese 2

1. With you marking pen and ruler, draw a diagonal line from corner to corner across all four of the small squares.

Flying geese 3

2. Place 1 small square on the corner of the large fabric square with the diagonal line starting at the corner. Make sure that the fabrics' right sides are together with the edges lined up.

Flying geese 4

3. Place a second small square on the opposite corner. The diagonal lines should meet and the squares will overlap by a 1/2".  Pin the small squares in place.

Flying geese 5

4. Sew a 1/4" seam on each side of the drawn line. This is a great time to use a 1/4" piecing foot if you have one.

Flying geese 6

5. With your ruler against the drawn line, cut the square into two triangles.

Flying geese 7

6. Press the seams towards the small pieces as shown. You now have two pieces that are somewhat heart-shaped.

Flying geese 8

7. Take another small fabric square and pin it to the point of the heart shape so that the drawn line runs from the point to between the top triangles.

Flying geese 9

8. Sew seams a 1/4" on each side of the drawn line. Once the seams are sewn, cut on the line just like you did in step 5.

9. Repeat steps 7 and 8 for the second heart.

Flying geese 10

10. Press seams towards the small triangles. Ta da! You now have 4 flying geese blocks.


I hope you all have a great weekend. I plan on sewing!

How to make a fabric ranunculus

As promised, here's a little how-to on the fabric ranunculus.

IMG_7141

First, cut your fabric into strips on the bias.  The width and length of your strips depends on how big you want your finished flower to be.  For this small flower, the strips are about 3/4" wide and around 10 to 15 inches long.  I used four strips here, but you made need a few more or maybe one less so cut as you go.  For a bigger flower, make the strips wider and longer.

IMG_7144 

IMG_7145

Next, using a small zig zag stitch (about 1.5 mm x 1.5 mm), sew along one long edge of your strip.  The idea here is for one side of the stitch to catch the fabric - you really have to be on the absolute edge.  Going slowly will make it easier.

IMG_7147

Along the other long edge, sew a gathering stitch (straight stitch, long in length).  Leave the thread tails long and gently pull one thread to gather.

IMG_7149

Starting on the outside of the flower, pin the gathered edge into the shape of a circle.  Stop pinning when you complete a full circle.

IMG_7152

Using a zig zag stitch, sew along the gathered edge of the circle.  When you come to the curves, leave the needle in the down position, lift the presser foot and rotate the fabric.  Continue until you finish sewing the pinned circle.  Back stitch and cut the threads.

IMG_7153 

IMG_7156

Continue gathering and pinning the strip in a circle, slightly overlapping the ends in a soft spiral.  You can fold the end of the strip under if you want.  Sew it in place.  Back stitch and cut the threads.

IMG_7157

Keep adding strips to your flower in this manner.  I varied the start and stop points of my strips and the direction to add interest - some go clockwise and some go counterclockwise.

IMG_7161

When you get to the center of the flower, zig zag back and forth at different angles to ensure that all edges are sewn.

IMG_7162

Before you stitch on a pillow or a skirt or a t-shirt, get out some scraps and try a practice flower.  It'll be worth the few extra minutes because you will get a good feel for how much you need to gather and how big to make the flower.  If you do this on a t-shirt, make sure you don't sew the back to the front.  Ahem.  Go slow, use lots of pins and have fun.

I'll answer any questions in the comment section.

A New Year's gift for you

Good morning!  And Happy 2009!

The girls are back to school today and Fatty is back to work.  It's quiet in the house.  Scout is trying to climb on my lap - she can't seem to settle.  I know just how she feels.  My mind is racing in a gazillion directions.  I have so much I want and need to do - clean, take down Christmas decorations, auction projects, knitting and sewing (of course!), cooking, baking, organizing, trashing out.  I could go on and on...

Yesterday, I felt the need to clean up around here and then changed my mind.  Instead, I wrote up a tutorial to share with you.  It's been requested quite a bit - I think you'll like it.  It's a quick, fast and satisfying project.  You can easily complete this in about an hour.

Coffee_cozy_047_1_1

Coffee Cozy!

I put the directions in a pdf - you can download it here.  It's also on the sidebar.

Go on, get sewing.  I'm going to workout and then tackle the Christmas tree.

***** EDITED:  I just printed out the pattern using the pdf and the template is smaller than my original.  Once I figure out why and then fix it, I will update this post and the pdf.  Sorry if this caused any problems.  I hate it when crap like this happens.  Bear with me.*****

UPDATE:  My printer scaled down the template automatically.  If you make sure to print the template at 100%, you should be fine.  One of the corners might get cut off, but I am sure you can wing that.  Right?  Phew.

Tutorials Comments